We use cookies to make your experience better. To comply with the new e-Privacy directive, we need to ask for your consent to set the cookies. Learn more.

-

-
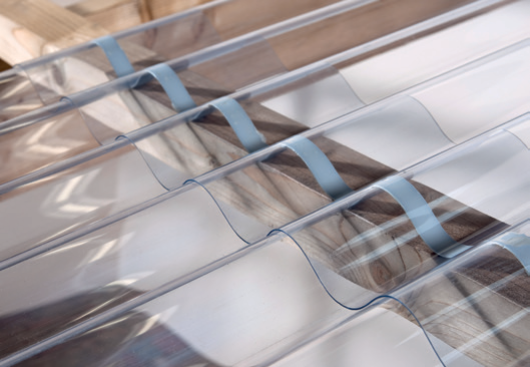
Installation Guide for Vistalux Corrugated PVC Sheets
April 03 2024 -
Installing Instructions for Trovidur EC Cladding Sheets
April 02 2024 -
Multiwall Polycarbonate Fitting Instructions
May 10 2023 -

Why Choose Acrylic Sheets?
February 05 2023 -
PVC Wall Panel Installation
August 31 2022 -
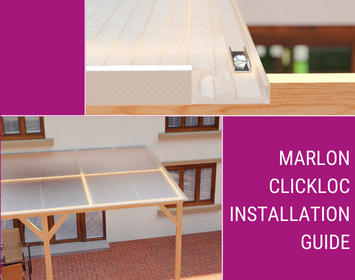
Marlon Clickloc Installation Guide
August 30 2022 -

Amari Plastics Launches Amari Sustainable
August 25 2022
Installation Guide for Vistalux Corrugated PVC Sheets
Post Date:
03Apr, 2024
Installation Guide for Vistalux Corrugated PVC Sheets
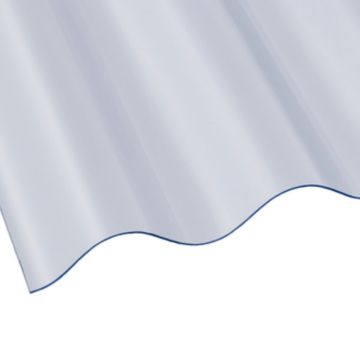
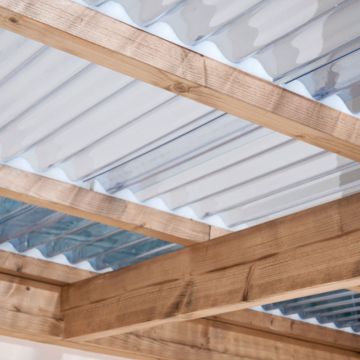
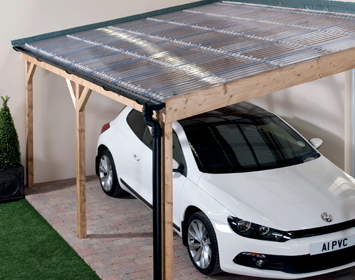
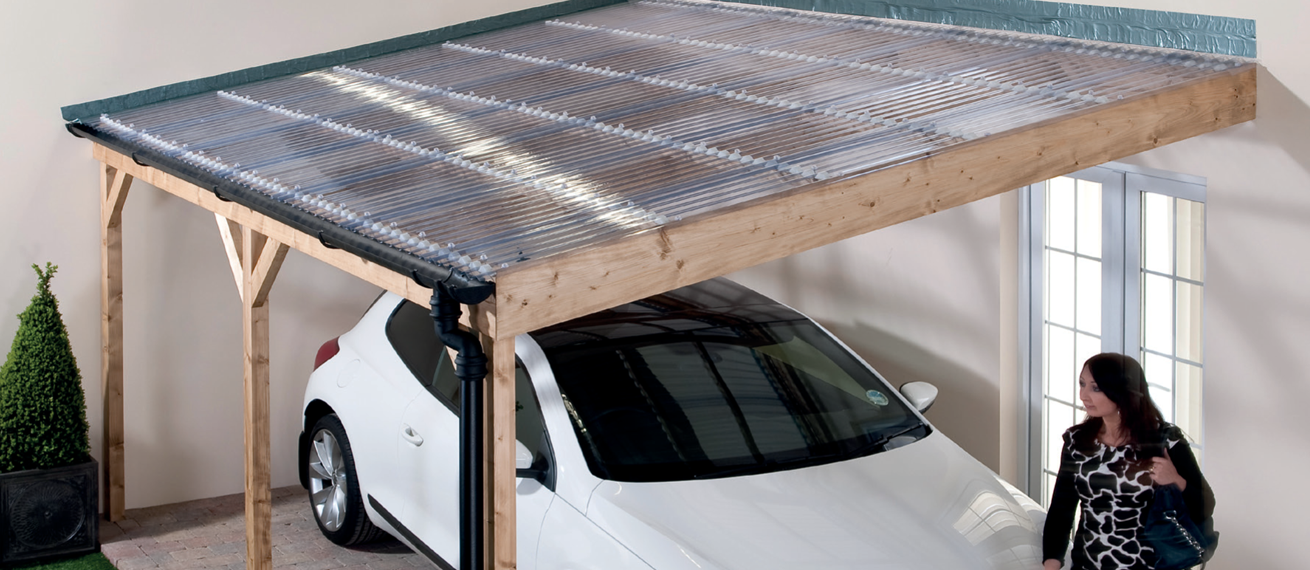
Welcome to the installation guide for Vistalux Corrugated PVC Sheets! Whether you're setting up a carport, canopy, or gazebo, Vistalux offers economic, lightweight, and durable solutions for your roofing and cladding needs. Follow these steps to ensure a smooth and successful installation.
1. Preparation:
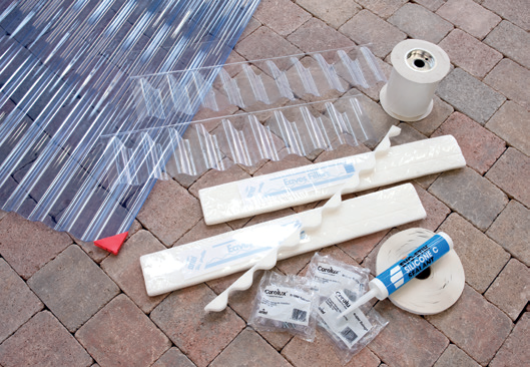
Before you begin, gather the necessary materials:
- - Vistalux PVC Sheet
- - Vistalux PVC Wall Flashing
- - Vistalux PE Eaves Fillers
- - Vistalux Super Fixings
- - Flashing Tape
Ensure a minimum slope of 5° for proper water runoff (a slope of 10° or more is preferred).
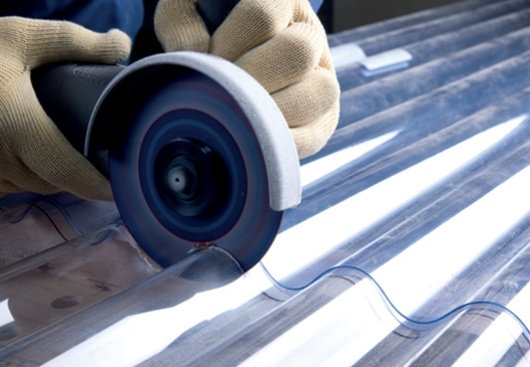
2. Cutting Sheets:
- - Arrange the sheets on the roof and mark hole positions and any necessary cuts.
- - Sheets should overhang the roof by 60mm for proper rainfall runoff.
- - Use an angle grinder with a metal slitting blade or fine-tooth saw to cut sheets. Support the sheet to minimize vibrations.
- - Avoid cutting in very cold weather. Warm sheets are less prone to damage.
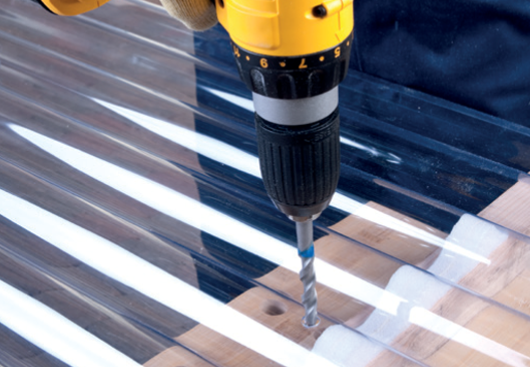
3. Drilling Sheets:
- - Pre-drill sheets before fixing, ensuring holes are larger than the fixing to allow for expansion.
- - Drill sheets singly with a masonry bit using low speed and light pressure. Support the sheet securely under each hole position.
4. Flashing:
- - Install Vistalux wall flashing at the top of the slope, fixed firmly into position with Butyl wall flashing tape to form a watertight seal.
5. Fixing:
- - Use our Foam Fillers under the sheets at support positions to prevent roof 'chatter' and provide support.
- - Secure sheets with our fixing screws, caps, and washers. The screw is sufficiently tight when the washer under its head can just be rotated with finger and thumb.
6. Joining Sheets (End to End):
- - Ensure an overlap of at least 150mm for a 10° slope or 300mm for a 5° slope.
- - Use Butyl Sealing Tape to prevent dust and dirt between the sheets.
7. Checklist:
- - Refer to Vistalux fixing guides for cover widths, fixing centers, and number of fixings per sheet.
- - Ensure temperature conditions are suitable for installation (-20°C to +60°C).
- - Ensure supports are dry and light-colored.
- - Avoid placing opaque materials under fixed Vistalux sheets to prevent distortion or discoloration.
- - Clean the roof with warm soapy water and a soft cloth or sponge.
- - Store sheets indoors on a flat, dry surface if possible. Outdoor storage should be flat on wooden bearers spaced at about 1m (3’ 3”) centers and covered completely with an opaque, light-colored tarpaulin.
8. Calculations:
- - Number of Sheets Required: Divide the roof width by the cover width.
- - Number of Fixings Required: Divide the roof width by fixing centers, divide the roof length by support centers, and add 1. Multiply these values together for the approximate number of fixings required.
Follow these steps diligently to ensure a successful installation of Vistalux Corrugated PVC Sheets, and enjoy the economic, lightweight, and durable roofing and cladding solution they provide! For further assistance, refer to Vistalux fixing guides or consult a professional.
Related Products